Onyfix®️ Tips & Tricks
The Onyfix®️ Nail Correction System (neubourg skin care GmbH, Germany) is a versatile and innovative product that allows for the conservative management of involuted and ingrown toenails. Onyfix®️ is an example of an in-situ, non-surgical, conservative and transitory treatment that, when used appropriately, can help to alter the morphology of the nail plate in a manner that improves a patient’s quality of life.
Although the application of Onyfix®️ is simple, mistakes during the application process can result in unexpected results. In this article we will cover some tips on how to have success with your Onyfix®️ applications. If you are new to implementing the Onyfix®️ Nail Correction System in your clinical practice, then we hope this article can help you to get the best possible results.
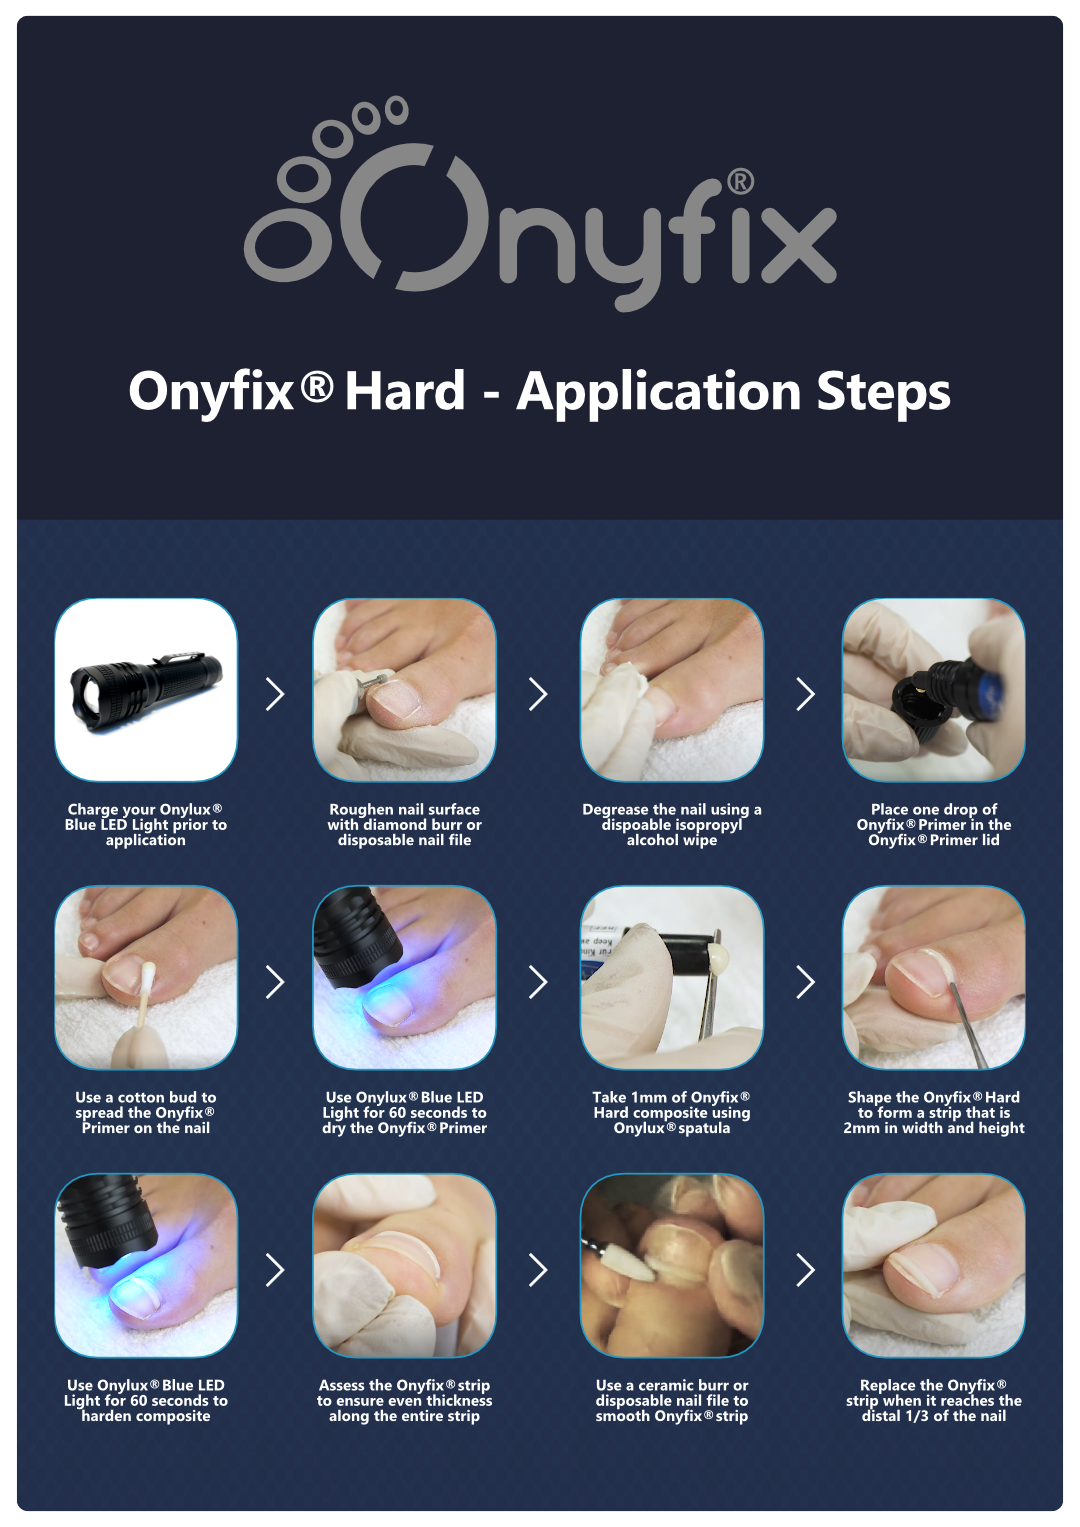
The Onyfix®️ Tips & Tricks listed below will follow the order of the application steps for easy reference, so to start, let's review the application steps.
You can view a high-resolution version of these application steps here.

Tip 1: Ensure your Onylux®️ Blue LED Light is charged.
As illustrated in the application steps above, the first step is to charge your Onylux®️ Blue LED Light. When your light arrives the battery will not be charged, so it's a great idea to place it on charge for 3 hours prior to your very first patient application.
There is no indicator that displays the current charge status of your Onylux®️ Blue LED Light, and there can also be differences in the power output of the Onylux®️ Blue LED Light when at different states of charge. For this reason we recommend that you charge your Onylux®️ Blue LED Light once per week for 3 hours, or three hours per 15 patients.
The battery in your Onylux®️ Blue LED Light is a Panasonic NCR18650PF Lithium Ion Battery. Like other lithium-ion batteries, it's best not to overcharge, so for this reason we recommend a consistent charging schedule that aims to keep the battery above 50% charged at all times.
The reason that this is Tip 1 is because not ensuring that your Onylux®️ Blue LED Light is charged is the primary reason for an Onyfix®️ strip to prematurely dislodge.
Tip 2: Consider how your application technique effects the bonding of your Onyfix®️ Hard and Onyfix®️ Soft composites.
The success of your Onyfix®️ treatment is influenced by the strength in which your Onyfix®️ strip bonds to the nail. So it's important to consider that there mechanical, physical and chemical treatments undertaken that improve the ability for our Onyfix®️ composites to bond to the nail surface.
Mechanical treatment - Burring the nail surface
Using a diamond burr, or disposable nail file on the nail surface serves a couple of important functions. Firstly, it helps to remove any contaminants on the surface of the nail that will negatively effect the bonding process. Secondly, it makes the surface of the nail course, which increases the surface area available for the Onyfix®️ composites to adhere.
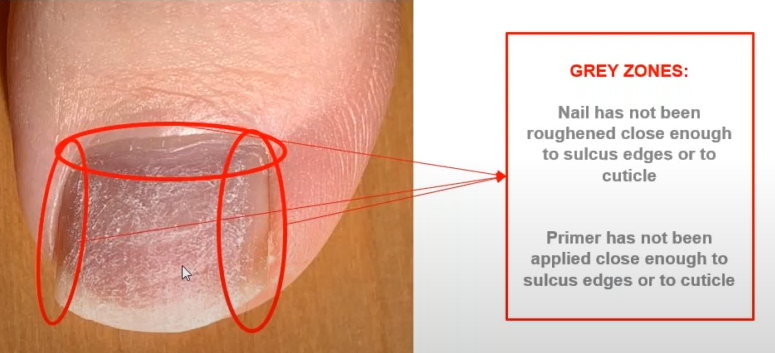
A common mistake in our mechanical treatment process can be seen below. The grey zones represent areas of the nail surface that have not been corrected burred. You want to make sure that you roughen the entire nail plate, as not doing so can cause premature dislodgement of your Onyfix®️ strip.

Physical treatment - Using the Onylux®️ Blue LED Light
The Onylux®️ Blue LED Light provides a direct source of energy which helps your Onyfix®️ Primer to cure and dry. A common mistake is forgetting to use your Onylux®️ Blue LED Light after Onyfix®️ Primer application. Missing this step can result in excessive residue being prevalent on the nail surface when your Onyfix®️ Hard or Onyfix®️ Soft composites are placed on the nail surface.
Chemical treatment - Degreasing the nail and Onyfix®️ Primer application
The purpose of using an isopropyl alcohol wipe on the nail surface at the beginning of your application is to ensure that no bodily fluids, residue, or fine lint is present on the nail surface prior to Onyfix®️ Primer application. You should avoid using gauze, cotton balls, or other types of products to prepare the nail surface, as such materials will leave lint and residues.
The way in which your Onyfix®️ Primer is applied to the nail surface is equally important. You should only use cotton tips that have a good firm structure and leave little to no cottons fibres on the nail surface.
Ensure that you only use a single drop of Onyfix®️ Primer. Too much Onyfix®️ Primer will not be beneficial to the bonding process. The primer only needs to just cover the surface of the nail. If the nail surface is wet, then your Onyfix®️ composites will not bond effectively.

Tip 3: Use the Onyfix®️ Soft when indicated.
Often clinicians will gravitate to one Onyfix®️ composite over the other. Some prefer the Onyfix®️ Hard, while others swear by the Onyfix®️ Soft. We encourage you to consider the difference between the two compounds and select the compound that will give you the best adhesion to the nail surface.
Onyfix®️ Soft has a lower viscosity, and is therefore more effective for thin and flexible nails. The lower viscosity of the Onyfix®️ Soft also allows it to better conform to the roughened surface of the burred nail plate. Often thin and more flexible nails will not have the textured surface of thickened gryphotic type nails, and as such this lower viscosity really does help.

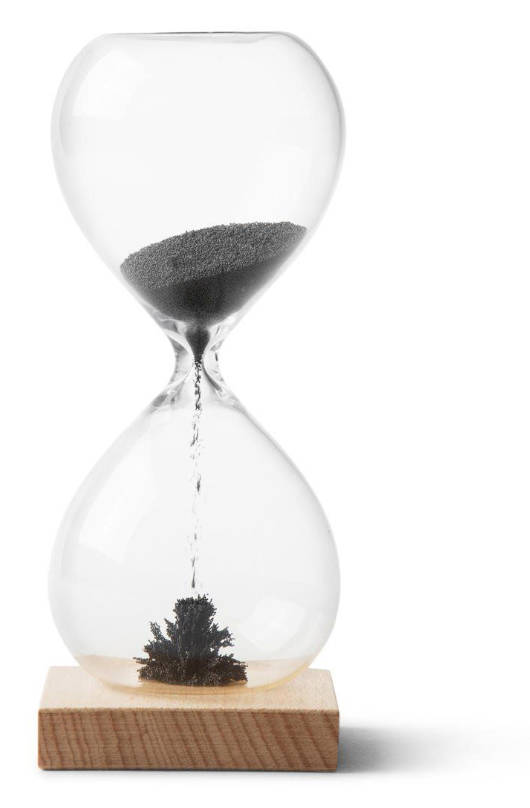
Tip 4: Purchase a 60 second hourglass.
We all know that when in clinical practice, you can lose track of time. Applying the Onylux®️ Blue LED Light for 60 seconds post-Onyfix®️ Primer and composite applications is critically important. Not taking the correct amount of time at these stages will lead to an improperly cured composite that will be ineffective.


Leave your comment
Note: HTML is not translated!